
How to Cut Vinyl
Cut vinyl into words, shapes and symbols to create decor for your home or office. Use your cutter to create a monogram on a water bottle, a school logo on your car or a label for your pantry.
When weeding, focus on the “negative” areas that surround and are within your design. Weeding is done with a scraper tool and aims to pull away all the vinyl that is not part of your final image.
Place the Vinyl on the Mat
Place your vinyl on the mat and line it up with the guide lines. Press it down firmly and smooth out any bubbles or wrinkles. Check that the design is centered and that you have enough room to cut it with your machine and material settings. Once you’re happy with your vinyl layout, click the green Continue button.
You’ll find your project on the next screen (the Prepare screen), along with all of your pieces separated into mats by color. If you’re using a Smart Vinyl, you can skip this step as it cuts “mat-less” so it doesn’t need to be placed on a mat.
For other types of vinyl, you’ll need to use a weeding tool to remove the excess vinyl from around your design that doesn’t need to be transferred to your final product. A weeding hook is the best tool for this job, but you can also use tweezers or a craft knife.
You’ll also need transfer tape and a scraper tool to apply your vinyl designs to the surface that you want to decorate. To make sure that the vinyl and the transfer tape stick together, it’s important to ‘burnish’ them by running a scraper tool over them several times. Once you’re done, peel the transfer tape and vinyl design away from the paper liner sheet.
Cut the Vinyl
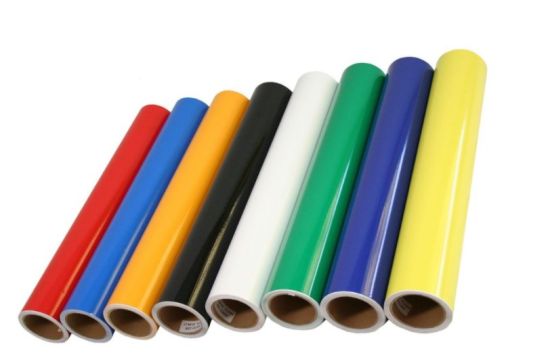
Vinyl is a plastic, film-like material with adhesive backing that can be cut Cutting Vinyl Rolls into pretty much any design and placed on a variety of slick, smooth indoor surfaces. It’s commonly used for decals and stickers, but can also be applied to glass, metal, plastic, furniture and more. It comes in a wide range of colors, sheens and textures. Vinyl comes in rolls of varying sizes, from 12×3 feet to 5 or even 20 feet. It’s often a better value to purchase the vinyl in rolls, which can be stored easily.
Unlike other types of cutting machines, a plotter or cutter uses vector graphic information to accurately cut shapes out of the vinyl. This makes the machine ideal for creating custom designs, and a variety of design software exists that’s easy enough for most users to use. It’s worth investing in a full-featured vector graphics program like Adobe Illustrator, although there are free and low-cost programs for creating basic lettering and simple graphics.
Once the image is ready to be cut, place it on the mat, paper liner side down. Ensure that straight edges are lined up along the white printed grid lines on the mat and press firmly to avoid movement during cutting. Then run the cut in your CAMEO machine following the prompts to Set Base Material. If you have trouble with the machine cutting cleanly through your vinyl, try increasing the pressure. This can be done on the final cut screen in Cricut Design Space, with a dropdown that offers pressure options such as Less, Default and More.
Weed the Vinyl
Weeding vinyl can be one of the most challenging parts of working with heat transfer vinyl, but it is important to get this step right. If you don’t weed correctly, you could end up with pieces of vinyl stuck to your mat, in the machine or on the item that you’re making.
There are a few different tools that you can use to weed vinyl, but our favorite is a weeding hook. This tool is designed to grab the small intricate vinyl pieces and pull them off of the transfer tape. It also helps to make the weeding process faster and easier.
Another way to make the weeding process easier is by placing a weed box around your design in the software before you cut it. This will help you to remove the outer edges of your design before weeding and can save you time and money in the long run.
It is important to note that you should always apply a layer of application tape over your unweeded vinyl before beginning the weeding process. This will ensure that your transfer tape sticks to the vinyl and doesn’t fall off during the weeding process. This will also help to protect your cutting mat from getting dirty or scratched up by the weeding process. Also, we recommend that you only use a cutting mat that is compatible with the type of vinyl you’re using and that you keep it covered with a piece of tape or painter’s tape while weeding so that it doesn’t roll up under itself or become damaged.
Transfer the Vinyl
Once you’ve cut your design and weeded it, it’s time to transfer it to your project. You can use a heat press or iron to do this, but you’ll want to Cutting Vinyl Rolls make sure that your fabric or other material is clean and free of any dust, lint, or oil that could prevent the vinyl from adhering properly. You’ll also need a Teflon cover sheet to protect your garments from any accidental burns during the pressing process.
The first thing you’ll want to do is to remove the paper backing from your vinyl. To do this, gently peel the tape at a 45-degree angle. If you’re using a high quality product like R-Tape Conform or EnduraMASK Perfect Tear Layflat tape, this shouldn’t be much of a problem. If you’re having trouble, try pulling at a slightly different angle and see if that helps.
Next, you’ll need to place your vinyl on the project base. Once you’ve done that, you can use your scraper tool to burnish the vinyl onto the fabric or other surface. After the vinyl is in place, you can peel away the transfer tape. Be careful not to pull at a bad angle or you might lift up the vinyl. If you’re having trouble, try gently lifting the tape at a slight angle and seeing if that helps.